By: Sarah Federico, Beauty and Lifestyle Writer
Chop-chop, snip-snip. Say goodbye to your uber-long quaran-fringe.
That once-perfect fringe that garnered complements a-plenty? Today those lovely bangs are hindering your ability to see. And that just won’t do. So, despite our long-standing advice of “leave it to the professionals,” we’re lifting the moratorium as it relates to at-home quarantine fringe-trims.
Here, we’re sharing celebrity stylist Chris Appleton’s step-by-step guide for very carefully attending to your ever-lengthening bangs.
“It’s always best to go to a salon to get this done,” says Appleton. “But if you’re forced to [trim your own fringe], this is how.”

But first, a word of caution
Trimming your fringe could be considered fairly straight forward (we’re hedging here, because it isn’t exactly, but then again –desperate times). Luckily, if you botch the job, they’ll most likely grow out before you emerge from your quarantine cocoon.
The caveat here, is that we highly advise against taking scissors to your lengths: a fringe, maybe. Layers and/or a blunt haircut? Just say no. Your stylist would not approve – and neither do we.\
Step 1: Start with dry hair
Stylists, can I get an amen? Appleton’s first step in achieving at-home fringe trimming success is, “start with dry hair.” That’s because wet hair springs up, so if you cut it in this state, your hair could end up much shorter than you intended.
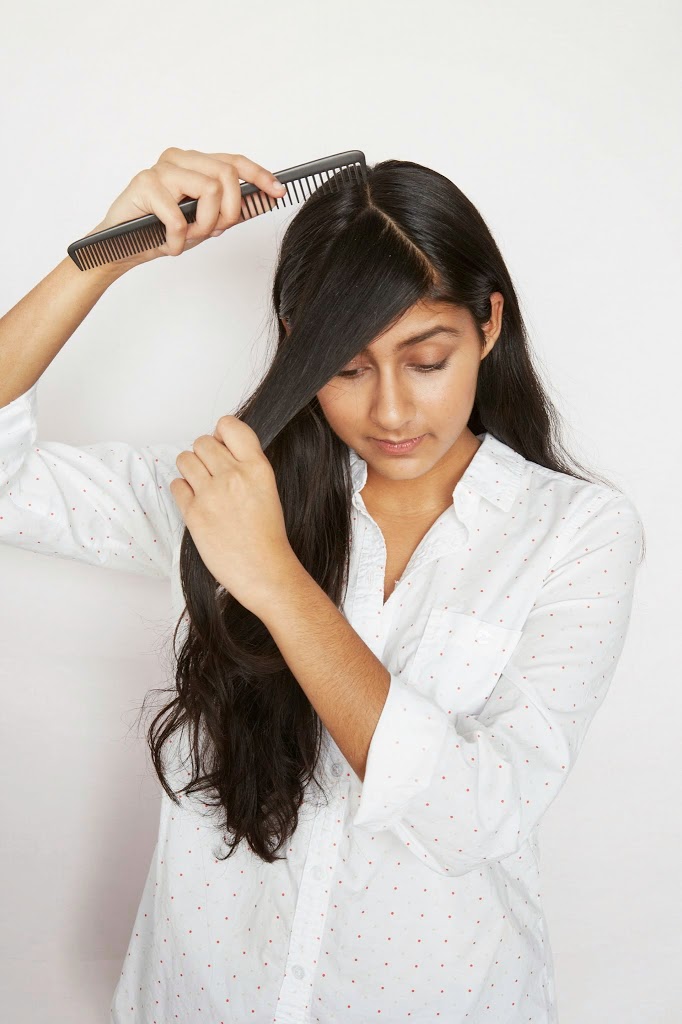
Step 2: Create a guideline
You know it well – that expertly executed sectioning that’s the jumping off point for a great haircut. Here, you’ll aim to accomplish a simplified version on your own. “Start with a triangular shaped section in the middle part going to the temple area,” says Appleton. “This is a great guideline to cut your bangs.”
Using clips, pin the rest of your hair away from your face; this will prevent any accidental cutting.
Images | Cup of Jo
Step 3: Before you cut, quick-tips
Instructions for cutting are immeasurably valuable, but equally as important is the short-list of common mistakes to avoid when cutting your fringe. Because, according to Appleton, two simple missteps can either make or break your results.
Tip one: “Most people when they cut their bangs, they tend to elevate out and to lift [the hair] up. Don’t do that. Make sure you keep the bangs flat, because that’s where the hair is going to sit.”
Tip 2: Don’t pull down with too much tension. “A lot of people get crazy and really pull the hair down. It’s naturally going to spring back up, so if you pull it down, it’s naturally going to be much shorter than you want it to be. So, keep your fingers super relaxed.”
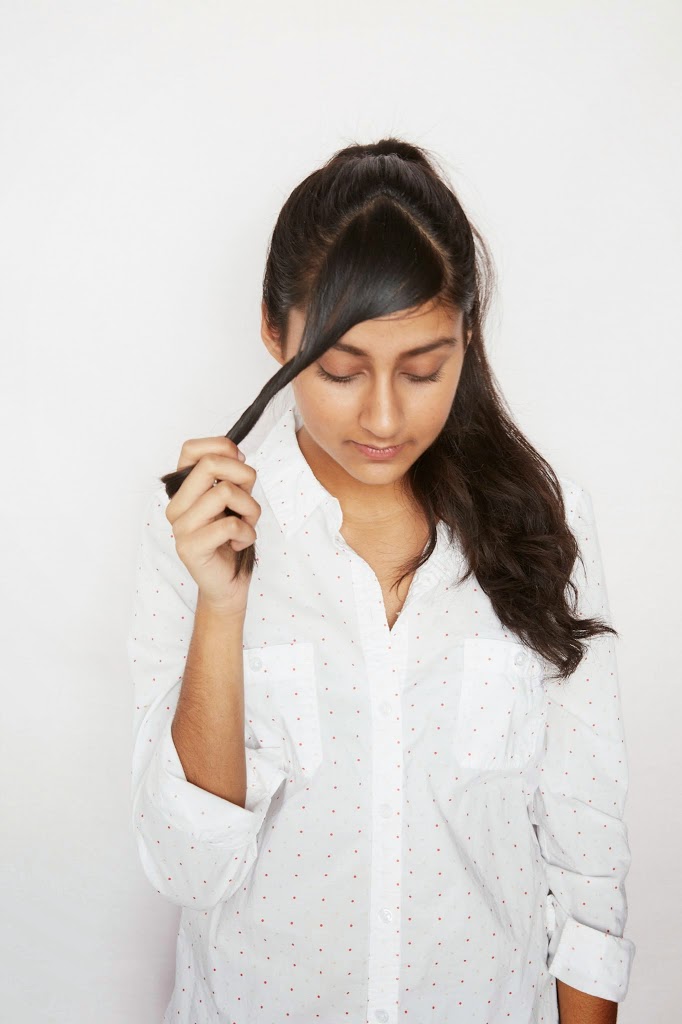
Step 3: Twist it
Get ready for the twist! It’s not quite as easy as it looks, and finger positioning is everything. Because where you put your fingers, is where you’ll make the cut.
“To cut the hair, you’re going to pull the hair forward,” instructs Appleton. “And then what I like to do is just twist it over, so we get the corners of the hair that sit longer. Remember, always go slightly longer than you want it, you can always go back in and trim it shorter.”
Step 4: Make the cut
“Keeping the tension low go in with the scissors and cut straight across. And there you have it.”
https://www.instagram.com/tv/B-pgxqcBcOL/
Remember, while the results of this technique might prove passable, they’re intended for dire COVID-19 quarantine hair emergencies only. Stylists we can’t wait to find our way back into your chairs, and put our lovely locks back into your capable hands. Until then, we’ll be oh-so carefully snipping our strands out of our eyes using this simple step-by-step process. Over and out.